
There are many ways or methods to so solve a rubik’s cube. All of these methods are have a different level of difficulties, for speedcubers or beginners but i’m going to show you the easiest way to solve the cube using the beginners method.
The method that i’m going to show you is the “Cross F2L Orientation Penetration (CFOP)” which is divided into layers in order to solve it by each layer applying the basic algorithms or pattern.
Before you start, I recommend you to read the basics notations of the rubik’s cube to understand the letters in algorithm.
F: front, B: back, R: right, L: left, U: up, D: down.
A letter by itself means a clockwise rotation of the face while a counterclockwise rotation are mark with an apostrophe ( ‘ ) but the good news we re not going to use the letter B (Back) face in this tutorial.
Clockwise Rotations: R, F, U, L, D
Counterclockwise Rotations: R’, F’, U’, L’, D’
Since that the method that we used is ‘CFOP’ , we literally started on the C which means cross
1. CROSS

Building a cross is not so hard, first you only need to choose the color of your base then next you need to find the color of the edges and combine it each other in the center of your base to make a cross. you can solve a cross without reading instruction.
You’re so lucky if the cross that you make is directly combine the color of the edges with another center. How about if the side of the cross and another center are not matching like this ?
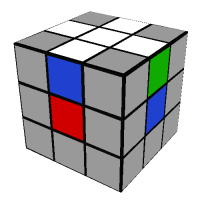
In this case you only need to do is to switch the edges but you’re going to use a algorithm or pattern. You just need to simply apply this pattern ( R, U’, R’, U, R ) but you need face in the red center in order to switch it properly without any mistake.
2. FIRST TO SECOND LAYER (F2L)
In this step you need to arrange the white corner pieces to the first place.

Twist the bottom the layer so that one of the white corners is directly under the spot.there are three possible outcomes that the corner flipped but there’s a solution of that problem we gonna use three algorithms depending on it’s orientation.

White on the right: R’ D R
White on the front: F D F’
White facing down : F L D2 L’ F’

White face solved
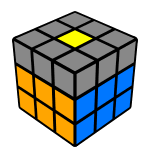
Since the corner has been placed on it’s perspective area or the white color has been complete or already done, all you need to do is to find the edges. at this point we need to turned the rubiks cube upisde down.
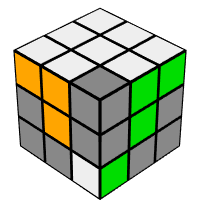
we have to learn the two algorithms that we need to use which are symmetric to teach other, They call them Left and Right algorithms.
before you solving the edges you need place it to the front of what you are facing color.
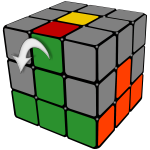
LEFT : U’ L’ U L U F U U’ F’

RIGHT : U R U’ R’ U’ F’ U F
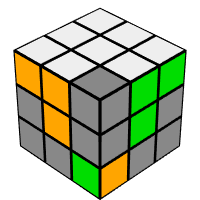
There’s a possibility that edges would be flip if you got wrong to face it to the right position but we need to fix it using this algorithms below the picture.
R U’ R’ U’ F’ U F R U’ R’U’ F’ U F
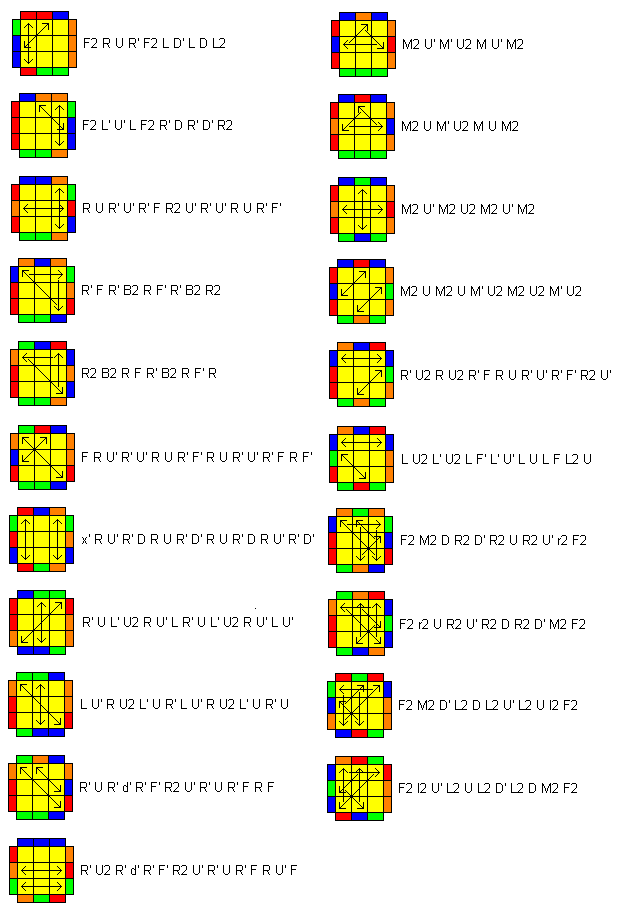
3. ORIENTATION LAST LAYER ( OLL or O )
In this part I only give all of the pattern and algorithms because it’s to teach one by one, since you can read the notation or the letter of the algorithms.

3. PENETRATION LAST LAYER ( PLL or O )
Also in these parts I only give the pattern and algorithms, but if are applying it you need face in the right position in order to solved it without any mistake.
If you already apply that methods or process i’m not certainly sure that you can solve the rub’ks directly. the purpose of this tutorial is to guide in the right method but you need to practice in order to expertise it
I hope you enjoy and learn everything about in this tutorial. That’s all, GOODBYE
